概要
- Qiskit について, サンプルプログラムを動かしてみた.
- 動作環境は, Google Colaboratory で行った
- 実行プログラム, 解説は, 下記の参照サイトをご覧ください
感想
- 本家のサイトにあるように, 実行結果が, 立体的なグラフで表現されたりと, 非常に高機能だと驚いた.
- 時間を見つけて, 今後も, ドキュメントの残りの部分を進めていこうと思う.
Qiskit Visualizations
- Qiskit の サンプルプログラム
- グラフ描画
- Qiskit の サンプルプログラム
- グラフ描画
|
1 2 3 4 5 6 7 8 9 10 11 12 13 14 15 16 17 18 19 |
[編集内容(Bell state)] from qiskit import * from qiskit.visualization import plot_histogram from qiskit.tools.monitor import job_monitor # quantum circuit to make a Bell state bell = QuantumCircuit(2) bell.h(0) bell.cx(0, 1) meas = QuantumCircuit(2) meas.measure_all() # execute the quantum circuit backend = BasicAer.get_backend('qasm_simulator') # the device to run on circ = bell + meas result = execute(circ, backend, shots=10000).result() counts = result.get_counts(circ) print(counts) |
|
1 2 3 |
[出力結果] ※実行するごとに, 測定結果が変わってくる. {'11': 4880, '00': 5120} |
|
1 2 3 4 5 6 7 8 9 10 |
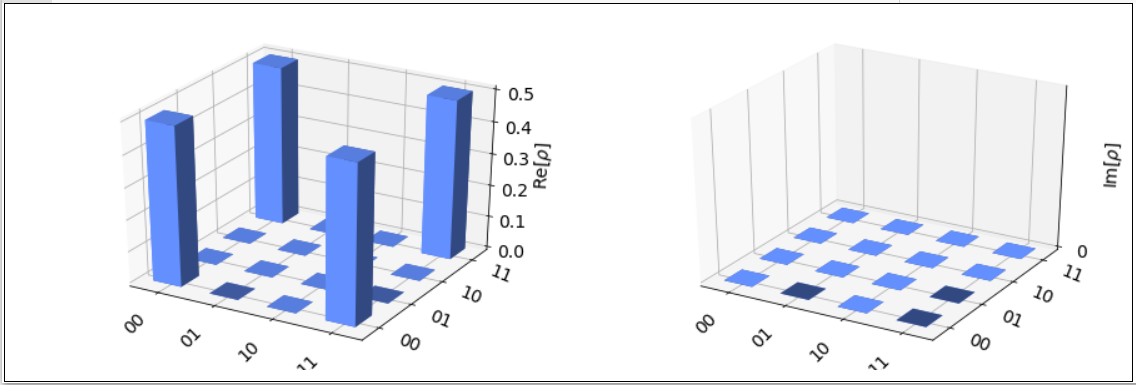
[編集内容(Bell state graph)] from qiskit.visualization import plot_state_city, plot_bloch_multivector from qiskit.visualization import plot_state_paulivec, plot_state_hinton from qiskit.visualization import plot_state_qsphere # execute the quantum circuit backend = BasicAer.get_backend('statevector_simulator') # the device to run on result = execute(bell, backend).result() psi = result.get_statevector(bell) plot_state_city(psi) |
|
1 2 |
[出力結果] ※グラフが描画された. |

|
1 2 3 4 5 6 7 8 9 10 11 12 13 14 15 16 17 18 19 20 |
[編集内容(3-qubit GHZ state)] from qiskit import * from qiskit.visualization import plot_histogram from qiskit.tools.monitor import job_monitor # quantum circuit to make a GHZ state ghz = QuantumCircuit(3) ghz.h(0) ghz.cx(0, 1) ghz.cx(0, 2) meas = QuantumCircuit(3) meas.measure_all() # execute the quantum circuit backend = BasicAer.get_backend('qasm_simulator') # the device to run on circ = ghz + meas result = execute(circ, backend, shots=10000).result() counts = result.get_counts(circ) print(counts) |
|
1 2 3 |
[出力結果] ※実行するごとに, 測定結果が変わってくる. {'000': 5044, '111': 4956} |
|
1 2 3 4 5 6 7 8 9 10 |
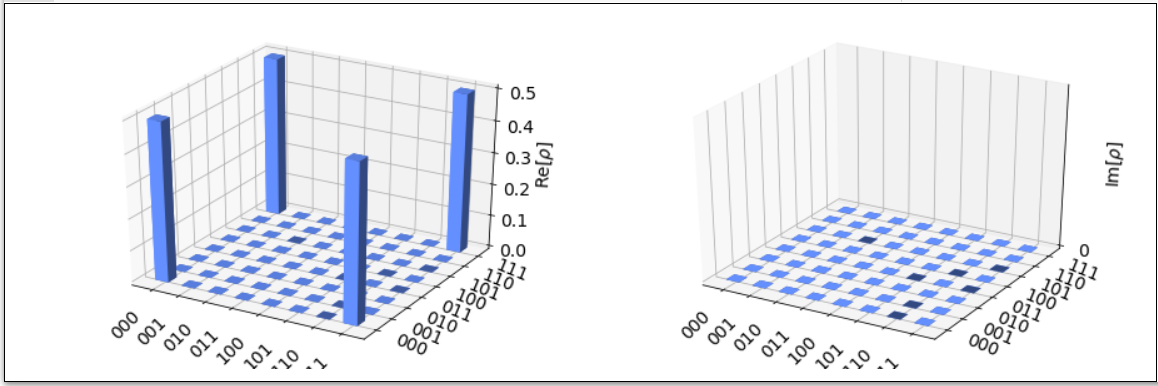
[編集内容(3-qubit GHZ state graph)] from qiskit.visualization import plot_state_city, plot_bloch_multivector from qiskit.visualization import plot_state_paulivec, plot_state_hinton from qiskit.visualization import plot_state_qsphere # execute the quantum circuit backend = BasicAer.get_backend('statevector_simulator') # the device to run on result = execute(ghz, backend).result() psi = result.get_statevector(ghz) plot_state_city(psi) |
|
1 2 |
[出力結果] ※グラフが描画された. |

Single-Qubit Gates
- 量子ゲート(1ビット)
- 量子ゲート(1ビット)
|
1 2 3 4 5 6 7 8 9 10 11 12 13 14 15 16 17 18 19 20 21 22 23 24 25 |
[編集内容(u3 gates)] import matplotlib.pyplot as plt %matplotlib inline import numpy as np from math import pi from qiskit import QuantumCircuit, ClassicalRegister, QuantumRegister, execute from qiskit.tools.visualization import circuit_drawer from qiskit.quantum_info import state_fidelity from qiskit import BasicAer backend = BasicAer.get_backend('unitary_simulator') q = QuantumRegister(1) qc = QuantumCircuit(q) # /usr/local/lib/python3.7/dist-packages/ipykernel_launcher.py:14: DeprecationWarning: # The QuantumCircuit.u3 method is deprecated as of 0.16.0. # It will be removed no earlier than 3 months after the release date. # You should use QuantumCircuit.u instead, which acts identically. # Alternatively, you can decompose u3 in terms of QuantumCircuit.p and QuantumCircuit.sx: # u3(ϴ,φ,λ) = p(φ+π) sx p(ϴ+π) sx p(λ) (2 pulses on hardware). # qc.u3(0, pi/4, pi/3, q) qc.u(0, pi/4, pi/3, q) qc.draw() |
|
1 2 3 |
[出力結果] ┌──────────────┐ q68_0: ┤ U(0,π/4,π/3) ├ |
|
1 2 3 4 5 6 7 8 9 10 11 12 13 14 15 16 17 18 19 20 21 22 23 24 25 26 |
[編集内容(u2 gates)] import matplotlib.pyplot as plt %matplotlib inline import numpy as np from math import pi from qiskit import QuantumCircuit, ClassicalRegister, QuantumRegister, execute from qiskit.tools.visualization import circuit_drawer from qiskit.quantum_info import state_fidelity from qiskit import BasicAer backend = BasicAer.get_backend('unitary_simulator') q = QuantumRegister(1) qc = QuantumCircuit(q) # /usr/local/lib/python3.7/dist-packages/ipykernel_launcher.py:15: # DeprecationWarning: The QuantumCircuit.u2 method is deprecated as of 0.16.0. # It will be removed no earlier than 3 months after the release date. # You can use the general 1-qubit gate QuantumCircuit.u instead: u2(φ,λ) = u(π/2, φ, λ). # Alternatively, you can decompose it interms of QuantumCircuit.p and QuantumCircuit.sx: # u2(φ,λ) = p(π/2+φ) sx p(λ-π/2) (1 pulse on hardware). # from ipykernel import kernelapp as app # qc.u2(pi/4, pi/3, q) qc.u(pi/2, pi/4, pi/3, q) qc.draw() |
|
1 2 3 4 |
[出力結果] ┌────────────────┐ q73_0: ┤ U(π/2,π/4,π/3) ├ └────────────────┘ |
