1. 環境は、Window 10 Home (64bit) 上で行った。
2. Anaconda3 (64bit) – Spyder上で、動作確認を行った。
3. python の バージョンは、python 3.6.5 である。
4. pytorch の バージョンは、pytorch 0.4.1 である。
5. GPU は, NVIDIA社 の GeForce GTX 1050 である。
6. CPU は, Intel社 の Core(TM) i7-7700HQ である。
今回確認した内容は、現場で使える! PyTorch開発入門 深層学習モデルの作成とアプリケーションへの実装 (AI & TECHNOLOGY) の 3.1 MLPの構築と学習(P.046 – P.049) である。
GPU転送の方法について書かれていたので, 少し動作確認を行った.
※プログラムの詳細は、書籍を参考(P.046 – P.049)にして下さい。
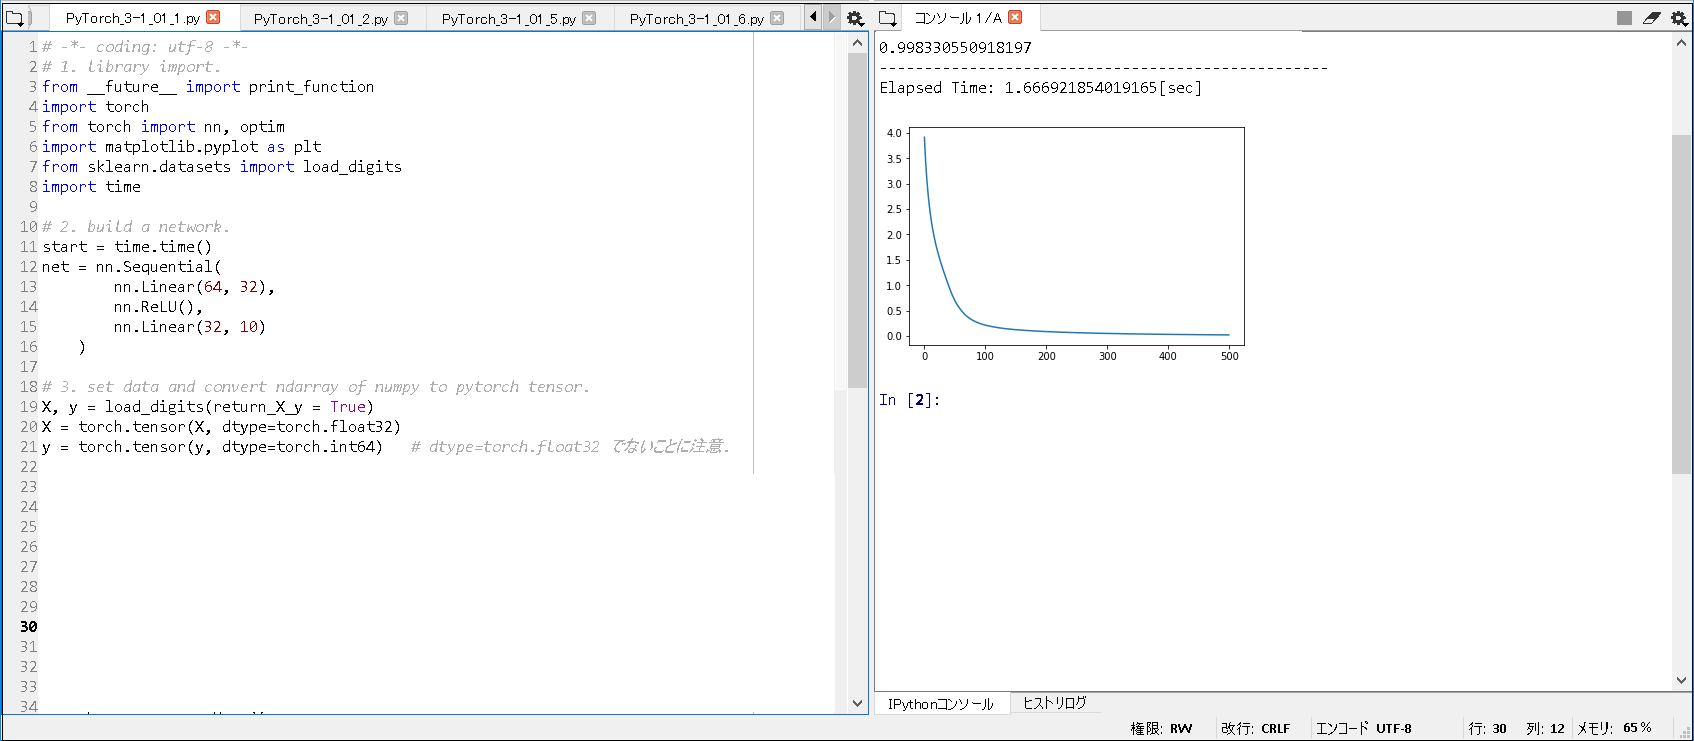
■①MLPの構築例(CPU版/合計2層).
|
1 2 3 4 5 6 7 8 9 10 11 12 13 14 15 16 17 18 19 20 21 22 23 24 25 26 27 28 29 |
# -*- coding: utf-8 -*- # 1. library import. from __future__ import print_function import torch from torch import nn, optim import matplotlib.pyplot as plt from sklearn.datasets import load_digits import time # 2. build a network. start = time.time() net = nn.Sequential( nn.Linear(64, 32), nn.ReLU(), nn.Linear(32, 10) ) # 3. set data and convert ndarray of numpy to pytorch tensor. X, y = load_digits(return_X_y = True) X = torch.tensor(X, dtype=torch.float32) y = torch.tensor(y, dtype=torch.int64) # dtype=torch.float32 でないことに注意. ~(略)~ # 13. display correct answer rate. print(out) end = time.time() print('--------------------------------------------------') print('Elapsed Time: ' + str(end - start) + "[sec]") |
■実行結果(CPU版/合計2層).
|
1 2 3 |
0.998330550918197 -------------------------------------------------- Elapsed Time: 1.666921854019165[sec] |

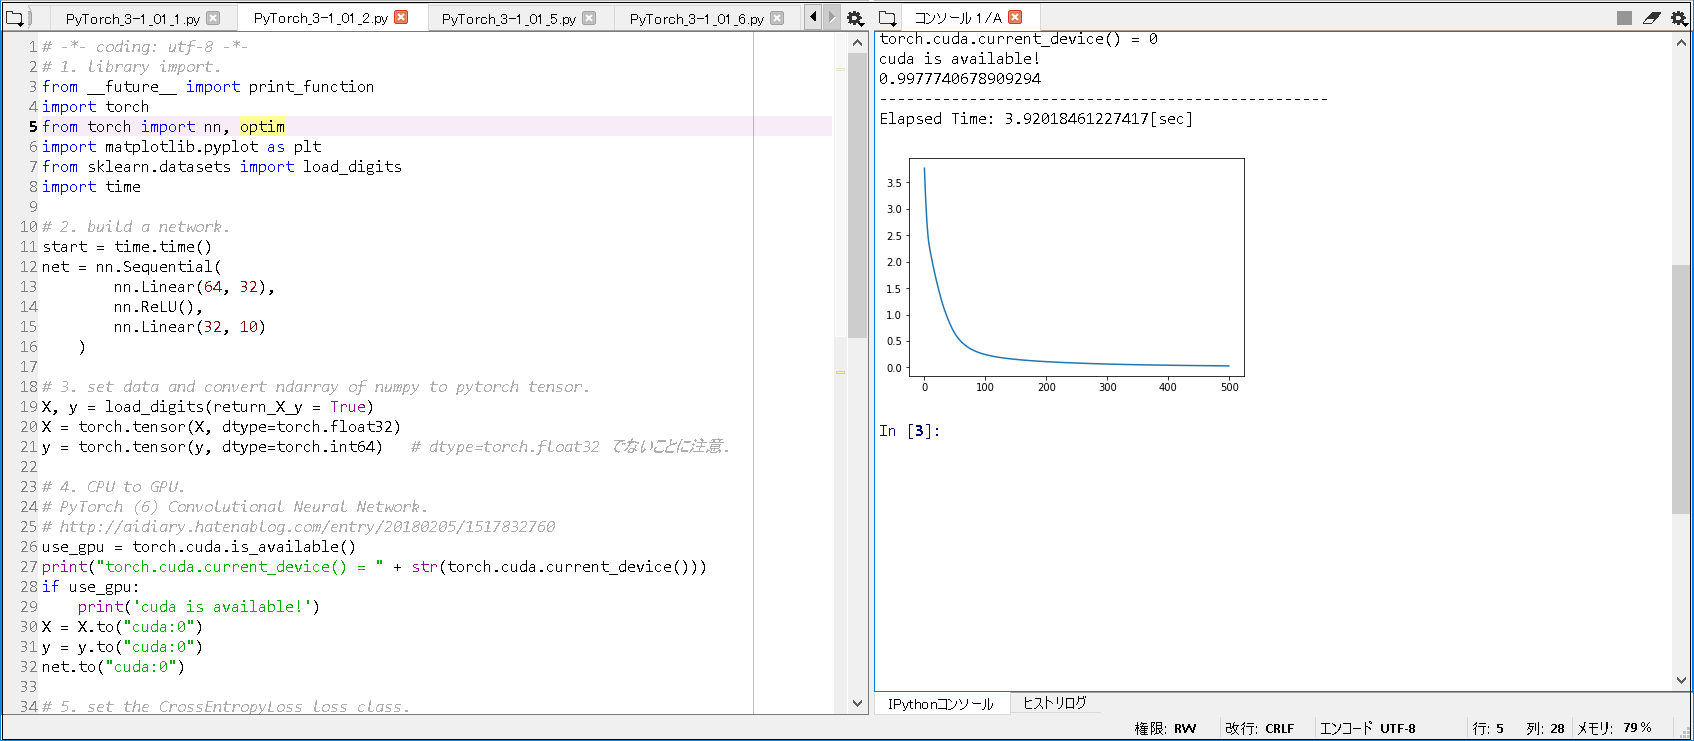
■②MLPの構築例(GPU版/合計2層).
|
1 2 3 4 5 6 7 8 9 10 11 12 13 14 15 16 17 18 19 20 21 22 23 24 25 26 27 28 29 30 31 32 33 34 35 36 37 38 39 40 |
# -*- coding: utf-8 -*- # 1. library import. from __future__ import print_function import torch from torch import nn, optim import matplotlib.pyplot as plt from sklearn.datasets import load_digits import time # 2. build a network. start = time.time() net = nn.Sequential( nn.Linear(64, 32), nn.ReLU(), nn.Linear(32, 10) ) # 3. set data and convert ndarray of numpy to pytorch tensor. X, y = load_digits(return_X_y = True) X = torch.tensor(X, dtype=torch.float32) y = torch.tensor(y, dtype=torch.int64) # dtype=torch.float32 でないことに注意. # 4. CPU to GPU. # PyTorch (6) Convolutional Neural Network. # http://aidiary.hatenablog.com/entry/20180205/1517832760 use_gpu = torch.cuda.is_available() print("torch.cuda.current_device() = " + str(torch.cuda.current_device())) if use_gpu: print('cuda is available!') X = X.to("cuda:0") y = y.to("cuda:0") net.to("cuda:0") ~(略)~ # 13. display correct answer rate. print(out) end = time.time() print('--------------------------------------------------') print('Elapsed Time: ' + str(end - start) + "[sec]") |
■実行結果(GPU版/合計2層).
|
1 2 3 4 5 |
torch.cuda.current_device() = 0 cuda is available! 0.9977740678909294 -------------------------------------------------- Elapsed Time: 3.92018461227417[sec] |

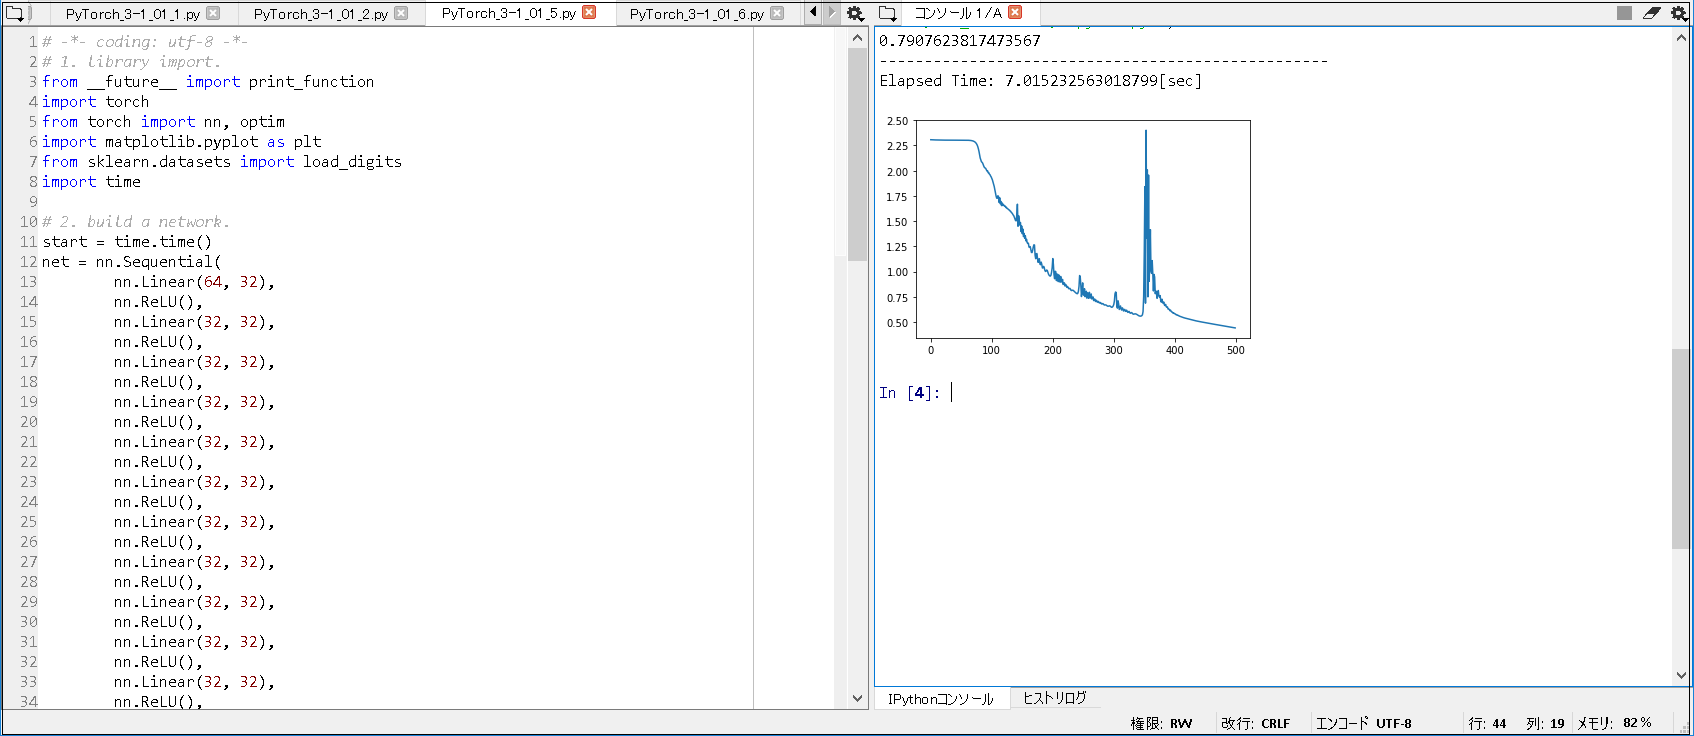
■③MLPの構築例(CPU版/合計20層).
|
1 2 3 4 5 6 7 8 9 10 11 12 13 14 15 16 17 18 19 20 21 22 23 24 25 26 27 28 29 30 31 |
# -*- coding: utf-8 -*- # 1. library import. from __future__ import print_function import torch from torch import nn, optim import matplotlib.pyplot as plt from sklearn.datasets import load_digits import time # 2. build a network. start = time.time() net = nn.Sequential( nn.Linear(64, 32), nn.ReLU(), nn.Linear(32, 32), nn.ReLU(), ~(略)~ nn.Linear(32, 32), nn.ReLU(), nn.Linear(32, 10) ) # 3. set data and convert ndarray of numpy to pytorch tensor. X, y = load_digits(return_X_y = True) ~(略)~ # 13. display correct answer rate. print(out) end = time.time() print('--------------------------------------------------') print('Elapsed Time: ' + str(end - start) + "[sec]") |
■実行結果(CPU版/合計20層).
|
1 2 3 |
0.7907623817473567 -------------------------------------------------- Elapsed Time: 7.015232563018799[sec] |

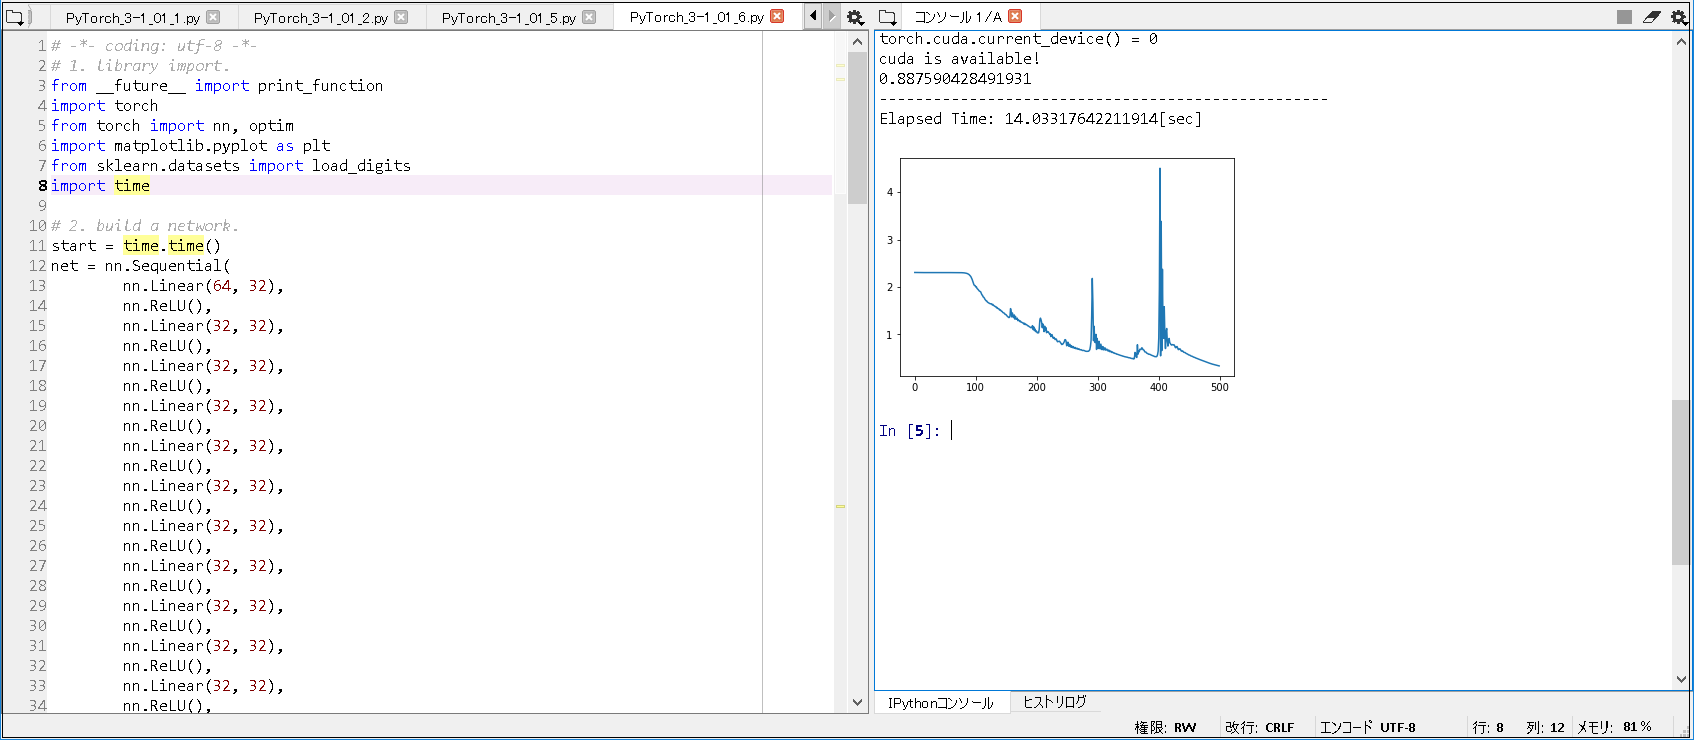
■④MLPの構築例(GPU版/合計20層).
|
1 2 3 4 5 6 7 8 9 10 11 12 13 14 15 16 17 18 19 20 21 22 23 24 25 26 27 28 29 30 31 32 33 34 35 36 37 38 39 40 41 42 43 44 45 46 |
# -*- coding: utf-8 -*- # 1. library import. from __future__ import print_function import torch from torch import nn, optim import matplotlib.pyplot as plt from sklearn.datasets import load_digits import time # 2. build a network. start = time.time() net = nn.Sequential( nn.Linear(64, 32), nn.ReLU(), nn.Linear(32, 32), nn.ReLU(), ~(略)~ nn.Linear(32, 32), nn.ReLU(), nn.Linear(32, 10) ) # 3. set data and convert ndarray of numpy to pytorch tensor. X, y = load_digits(return_X_y = True) X = torch.tensor(X, dtype=torch.float32) y = torch.tensor(y, dtype=torch.int64) # dtype=torch.float32 でないことに注意. # 4. CPU to GPU. # PyTorch (6) Convolutional Neural Network. # http://aidiary.hatenablog.com/entry/20180205/1517832760 use_gpu = torch.cuda.is_available() print("torch.cuda.current_device() = " + str(torch.cuda.current_device())) if use_gpu: print('cuda is available!') X = X.to("cuda:0") y = y.to("cuda:0") net.to("cuda:0") ~(略)~ # 13. display correct answer rate. print(out) end = time.time() print('--------------------------------------------------') print('Elapsed Time: ' + str(end - start) + "[sec]") |
■実行結果(GPU版/合計20層).
|
1 2 3 4 5 |
torch.cuda.current_device() = 0 cuda is available! 0.887590428491931 -------------------------------------------------- Elapsed Time: 14.03317642211914[sec] |

■注意点として, 以下のことが分かった.
① 層の数を増やしても, 必ずしも, 正解率が上がらない点が分かった.
実行結果(CPU版/合計2層): 0.998330550918197
実行結果(CPU版/合計20層): 0.7907623817473567
を比較すると, 実行結果(CPU版/合計2層) の 前者の方が, 正解率が高いことが分かる.
実行結果(GPU版/合計2層): 0.9977740678909294
実行結果(GPU版/合計20層): 0.887590428491931
を比較すると, 実行結果(GPU版/合計2層) の 前者の方が, 正解率が高いことが分かる.
② ここでのMLPにおいては, GPU転送しても, 高速化するわけではないことが分かった.
実行結果(CPU版/合計2層): Elapsed Time: 1.666921854019165[sec]
実行結果(GPU版/合計2層): Elapsed Time: 3.92018461227417[sec]
比較すると, 実行結果(CPU版/合計2層) の 前者の方が, 処理が早く完了していたことが分かる.
実行結果(CPU版/合計20層): Elapsed Time: 7.015232563018799[sec]
実行結果(GPU版/合計20層): Elapsed Time: 14.03317642211914[sec]
比較すると, 実行結果(CPU版/合計20層) の 前者の方が, 処理が早く完了していたことが分かる.
■参考書籍
現場で使える! PyTorch開発入門 深層学習モデルの作成とアプリケーションへの実装 (AI & TECHNOLOGY)
